Wednesday, November 7, 2012

Zion: TR for Shune's Buttress


There is nothing like the fall climbing season in the Utah desert.  Since moving back to Salt Lake City, I had visions of taking weekend getaways to former roadtrip destinations like Zion and Indian Creek.  I had goals to climb long multi-pitch desert sandstone routes, Shune’s Buttress being one of them.  In late September, I managed to escape the bustle of Salt Lake City and my new job as an ICU nurse.  In just two quick days, I was again reminded of the gifts that climbing and the natural world continue to give me.

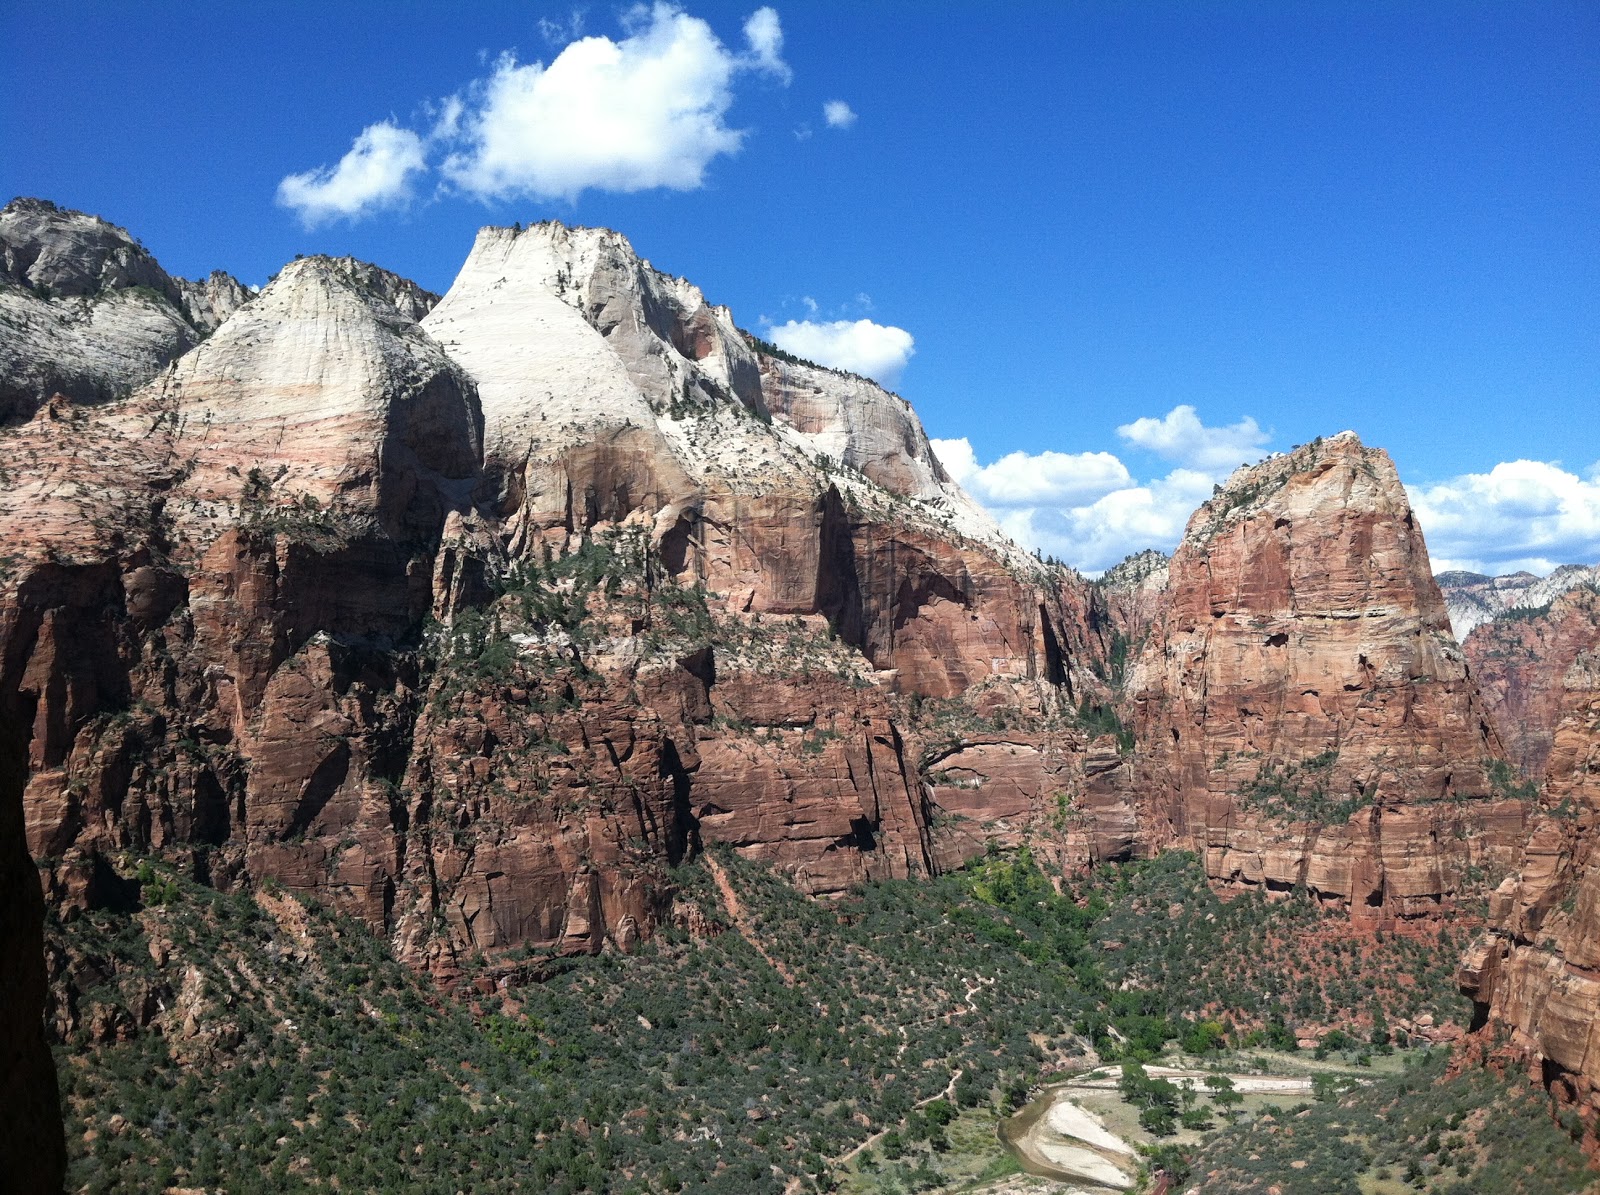
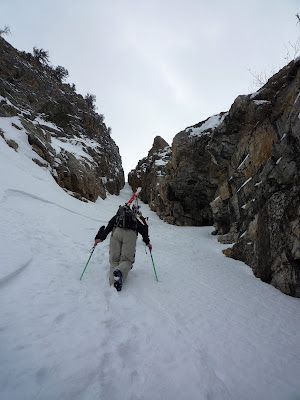
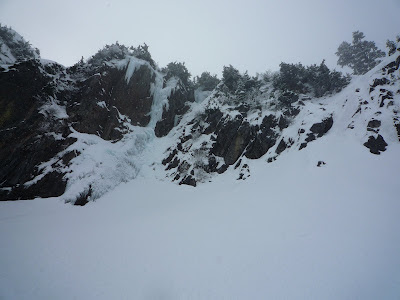
Shune’s buttress ascends the north face of Red Mountain Arch.  The approach is less than 30 minutes and requires nothing more than walking up a few switchbacks and scrambling over a few rock outcroppings after getting off at the Grotto shuttle stop.  The route consists of about 8 amazing pitches mostly in the 5.10 – 5.11 with everything from face climbing to finger cracks to offwidths.  Here is the beta:

Pitch 1

There are two options. My partner, Matias opted to lead the left variation.  Basically, this isn’t a warm up pitch and it is in-your-face 5.11+ climbing from the ground until the anchor 165 ft later.  It basically ascends a finger crack in a left facing corner. The middle of the pitch relents a little bit and there are some gear placements in the #3 camalot range. The final moves are funky and techy face/crack climbing. Matias impressively onsighted this pitch!

Pitch 2

Uneventful 5.9 chimney/wideness. About 100 feet to the next ledge.  There is also an option to do a 5.10 finger crack to the right. I didn’t see it. I also didn’t really look and the 5.9 chimney seemed like the most obvious way to me.

Pitch 3

This is the “5.10” OW.  Matias and I both struggled on this pitch and had a hard time moving from inside to OW to a layback position so that you could pull over the lip.  I’m sure a  climber with better OW technique wouldn’t find it that hard.


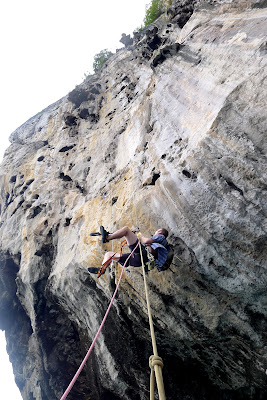
Matias starting up the OW
Pitch 4

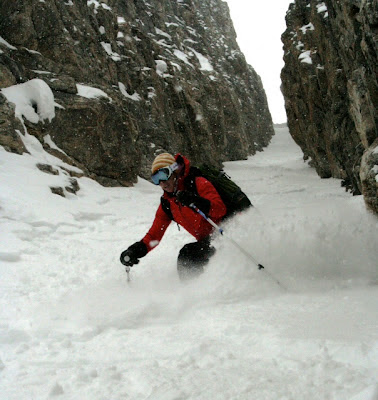
Another enjoyable 5.10 wide pitch.

Pitch 5

This pitch ascends a mellow 5.9 chimney with lots of face holds. You finish by tunneling through a cave and then belay on a little pillar.


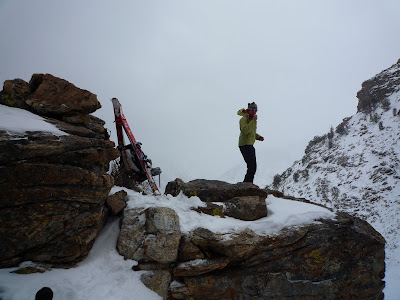
Topping out on pitch 5
Pitch 6

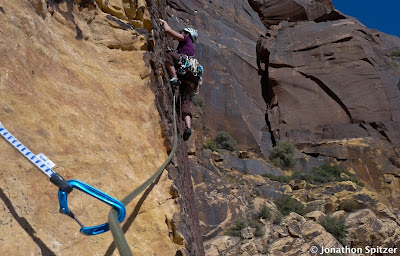
This short pitch traverses through a couple moves of 5.11a face climbing.  I was gearing up for some heady climbing and poor gear and was pleasantly surprised by the well protected crux and lack of trickery.  Basically, you want to climb down off the pillar, the opposite way that you ascended. You will see an old bolt. I didn’t clip the old bolt because well it looked old and would cause some directional issues. Instead I awkwardly placed a descent blue tcu in a small flaring crack.  After climbing up a few feet there is a nice, new bolt that protects the crux. There is a bit of run out face climbing to the anchor but it is quite easy (5.7ish).


Top of Pitch 6

Pitch 7

This is the enduro 5.11+ crux.  You want to traverse left and ascend a steep finger crack towards a roof.  Your belayer wont be able to see you after the first couple moves. There are some pretty tough moves leading up to the roof and then the roof is quite strenuous. For unknown reasons, Matias set up a hanging belay right after the roof with all of our #1 camalots. His native language is Spanish. Mine is English so we must have had a communication breakdown.  I wouldn’t recommend doing that. Instead I would suggest continuing up the steep hand crack and heading towards a belay at a little alcove with 1 bolt. The anchor can be backed up with a hand size piece or if your hand sized pieces are all gone, you can get creative and back it up with 4” piece.


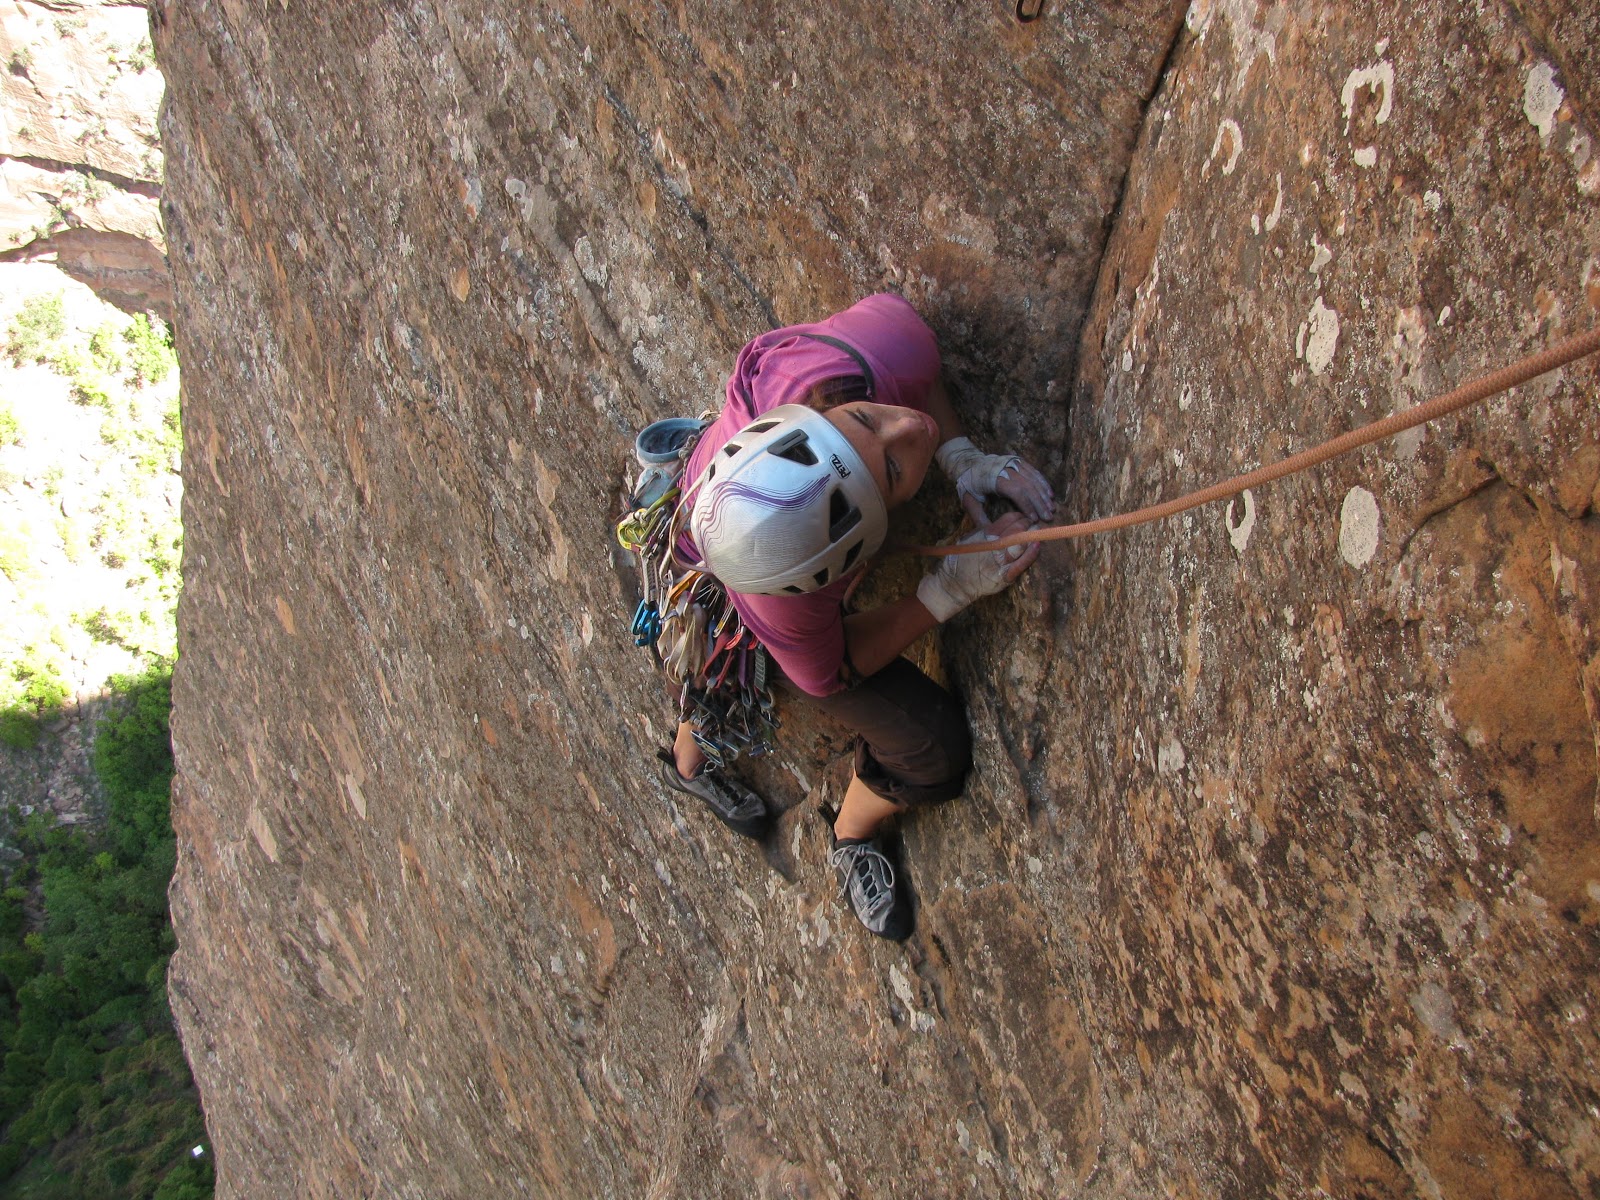
Starting up the beginning of pitch 7
Pitch 8

Mellow and enjoyable 5.9 face and crack climbing that trends left for almost a full rope length.


Descent

The rappel begins to the climbers right of the route and is a combination of double and single rope rappels to avoid all the rope snagging blocks.  We brought a 60 m 6 mm tag line to save a little weight. We miraculously made it to the ground with no issues!

Rappel 1: Double Rope to a hanging station
Rapel 2: Double rope trending climber’s left to the top of the 5.11a traverse. Don’t head towards the pillar.
Rappel 3:  Single rope down the 5.9 chimney
Rappel 4: Double rope to the top of pitch 2
Rappel 5:  Single rope to the top of pitch 1
Rappel 6: Double rope to the ground.


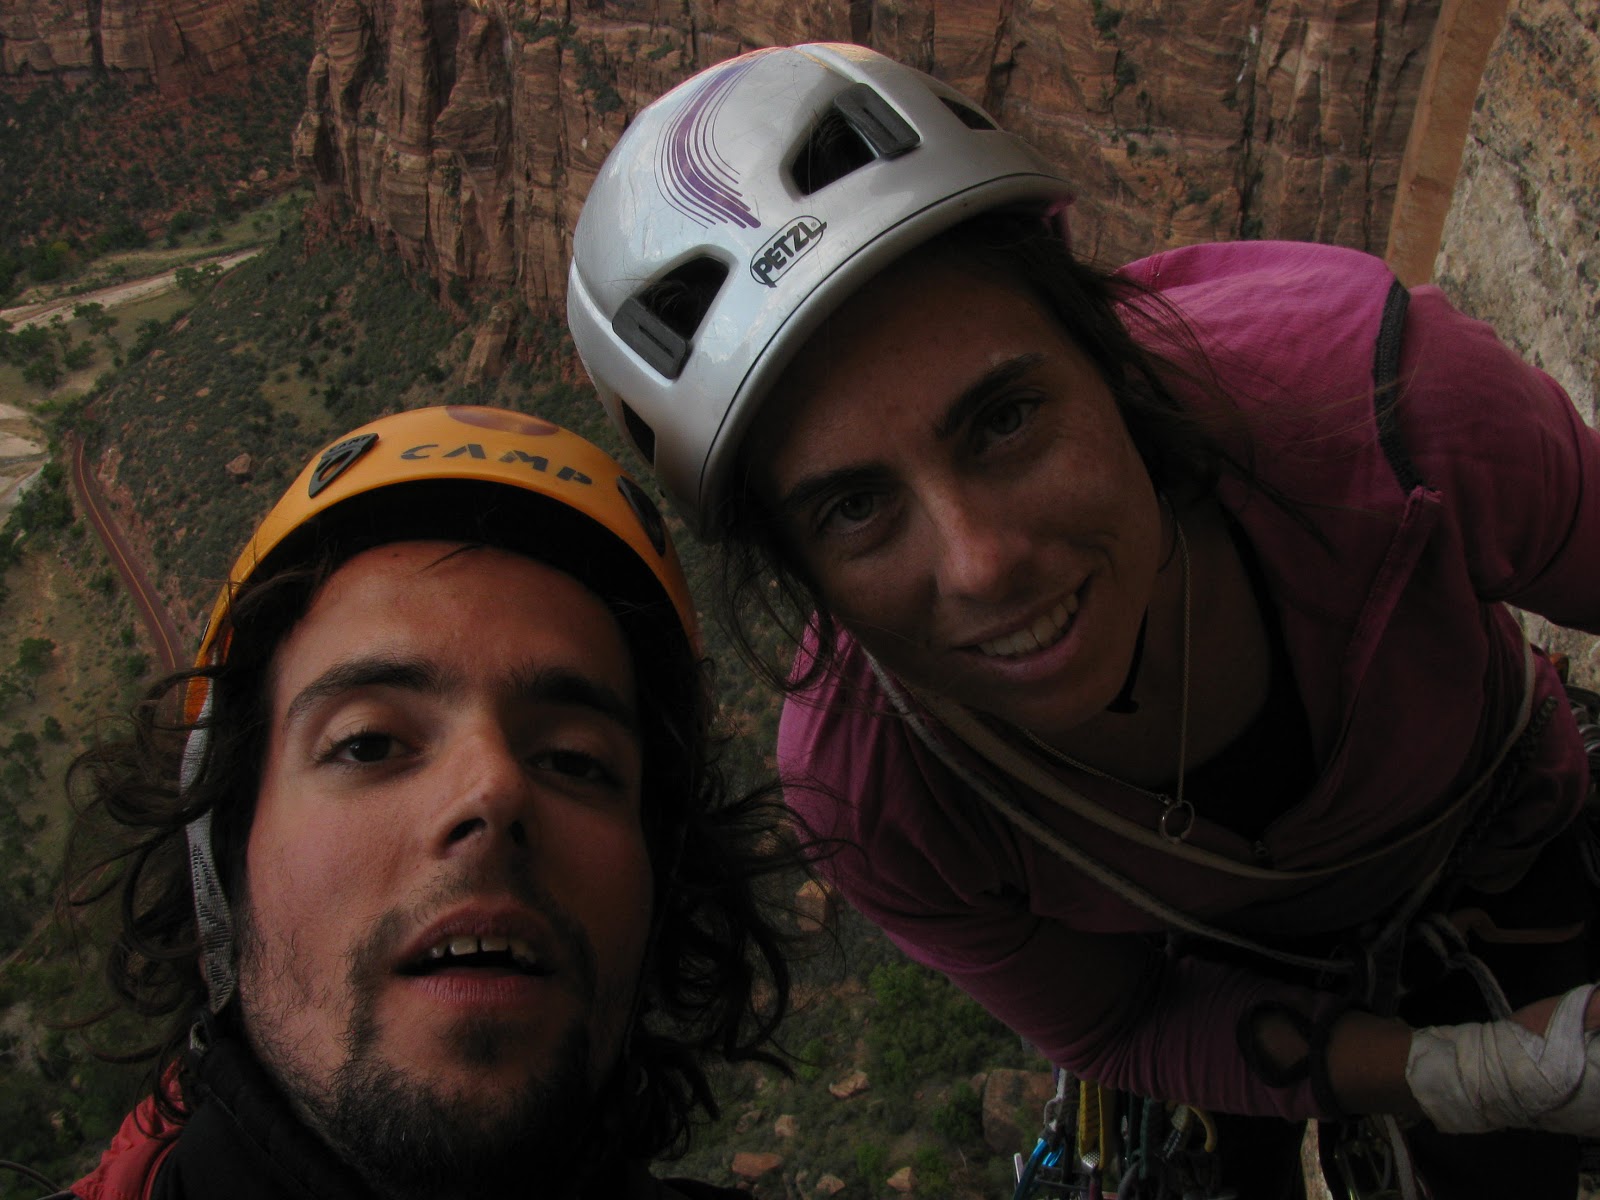
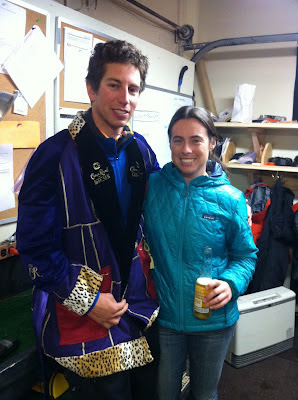
Matias and I after the first rappel
Group Gear

Many cams and nuts. I believe we brought a double set from green C3 to #3 camalot.  We brought triples from yellow tcu to #1 Camalot. We brought 1, 3.5 camalot and 1 slightly bigger piece. I wanted a third #3 camalot but that is because I’m a wimp when it comes to that size!

10 runners about half of which were the ange quickdraws and the other half were shoulder length slings


60 m, 6 mm tag line

Small backpack with windshirts, food and water

Personal Gear

1 double length slings

3 attache 3D locking carabiners and 1 belay device


La Sportive Muira lace ups which fell apart on the first pitch!


Tuesday, July 31, 2012

Mt. Slesse - NE Buttress

On Saturday, July 28, Chad Kellogg and I made an ascent of the NE Buttress of Mt. Slesse.  Since I'm moving to Salt Lake City on Saturday to begin a new career as a nurse, I was seeking a climb that would satisfy my adventurous alpine side for awhile.  Mt. Slesse offered exactly the type of North Cascades adventure I was in search of and then some.

We drove to the trailhead on Friday night.  I found this map to help us find the trailhead as its a little confusing in the dark.  The Nesakwatch Creek road is pretty rugged and a high clearance vehicle is mandatory to get to the trailhead.

We began hiking at 3:45 am.  The approach was straightforward despite being very wet due to the low lying clouds.  We were soaked once we got out of the trees.


We crossed these slabs below all the debris to reach the notch that leads to the pocket glacier.

I thought down climbing to get onto the glacier was a bit sketchy since the rock was really wet and loose.  Once on the pocket glacier, I realized that the sketchiness had only begun. . . . I have to admit, I was fairly scared while walking across the pocket glacier, despite having spent lots of time on glaciers.  If it wasn't for my faith in Chad's navigation, persistence and judgement, I would have turned around.  Instead I just tried to remember to breath and walk really fast! I wouldn't really recommend this unless you are super comfortable navigating very broken glaciers.


We saw this really cool arch on the glacier.


View of the glacier from the initial ledge on the route.


Very happy after getting to the other side of the pocket glacier!

Once off the glacier, life got a lot better!  We simul-climbed the first several pitches of low 5th class.  We pitched out a couple steeper ones.  It was hard to determine where we were on route since we were still in the clouds.  Around noon, we managed to get ourselves off route for awhile.  I wondered up, down, right, and left in attempt to get us back on route.  After that approach didn't work we decided to rap to get ourselves back on route.  Of course when we pulled the rope, it got stuck!  An hour and a half later, we were back on route and I led up an awesome and steep 50 m pitch.  To avoid this error, I would recommend staying more to the climbers right around pitch 12 and not heading to faded slings around a small horn.


Chad leading up terrain down low on the buttress.


Me starting up one of the first steeper pitches.


From this point on, the climbing only got better.  Once the clouds opened up, we were rewarded with the most amazing views ever.  The North Cascades are such a special place. The terrain is so rugged and beautiful and its just a 4 hour drive from Seattle.  Looking out at all the valleys, I felt so happy and so fortunate to be in this beautiful spot.  It is moments like this that I am reminded about why I love to climb.


:)


Up high on the buttress

We simul-climbed a bit more and pitched out the steeper looking sections.   The climbing was interesting and fun and the rock quality was pretty good. The buttress went on forever and I remembered that 2500 feet of climbing can take awhile.  I was beginning to feel a bit tired but tried not to show my fatigue.  Finally at around 6 pm, I lead the final bit to the summit!  It was a bit anti-climatic since I new the descent was going to be epic and we only had a few hours of daylight left.


Chad coiling the rope on the summit


Summit shot

After taking a few photos, we quickly transitioned into rappel-mode, e.g. the worst part about climbing.  It turns out a 60 m rope does not get you to the correct stations so we had to add a few anchors and make a couple extra short rappels.  


At one of the rappel stations

We were planning on doing the crossover descent, so we pulled out our 3 page description of the descent once we finished the rappels.  It was a bit epic to say the least.  We made it through 'critical routefinding 1' in the daylight.  While down climbing the gully, Chad pulled off a couple large blocks.  For a second, I thought he was going with them.  That was not a highlight of the climb.  We might have been in the wrong gully.  After that, Chad basically started running to find 'critical routefinding 2' before darkness.  I tried to keep up but needless to say, I couldn't breath.  It soon got dark and we hadn't completed 'critical routefinding 2.'  We scrambled up and down a little summit in search of a rappel with black slings.  At this point, I thought I was going to have my first ever unplanned bivy.  But I learned that Chad is really persistent and eventually he found the rappel.  Supposedly after 'critical routefinding 2' the descent gets easier but with all the snow the description wasn't entirely accurate and of course it was hard to see.  We spent quite a bit of time wandering around on a snow slope searching for an easy way to get  down into the forest.  At one point, I yelled out (probably not very politely), "Where are you going?"  Chad's response was, "I don't know."  Again, I thought we were going to have to bivy.  I was wrong and eventually we found a way into the trees.  Once in the trees, the description says walk left and look for flagging.  To me, this seemed incredible random and highly unlikely that we would actually find this flagging with such a vague description.  Again, I thought we were going to have to bivy,  I was actually starting to look forward to it.  So once again, Chad proved me wrong and he found the flagging after weaving back in forth through the forest.  And I'm so happy he found it, because it took us down a really nice trail.  Also there is no longer an intense bushwack at the end of the descent.  It is now a very nice trail!


The descent basically traverses this ridgeline for a bit and goes down the snow slopes eventually

All said, the descent took about 10 hours and we got back to the truck around 4 am.  I was worked and immediately passed out.  Chad and I had both really wanted to climb this peak and we were both super psyched to have had such a fun adventure.  It is experiences like these that keep me sane as I navigate through all of life's highs and lows.  These types of adventures remind me that it is worth it to work hard in life so that I can pursue my passions in my free time.  I can't wait for more.

Friday, July 27, 2012

Summer Climbing in the Pacific Northwest


View from the top of South Early Winter Spire, WA Pass


Summer in the PNW conveniently arrived when I finally finished nursing school, passed the boards and secured an awesome job!  I definitely couldn’t complain about that!  At the same time, my injured ring finger started to show some signs of healing and I began to slowly re-establish my climbing fitness.   I have spent most of the month of July enjoying the variety of climbing that Washington and British Columbia offer.

First up was a trip to Sqaumish with Jonathon.  My goal was to get back in shape mentally and physically.  On our first day we explored the amazing crack climbs on the lower malamute.  Highlights included climbing Caboose, named because its literally right next to the railroad tracks.  In the afternoon we moved to the base of the Grand Wall and I finally got a chance to climb the classic 5.10 finger crack, Exasperator in 1 long 50 meter pitch! It was pretty great.  Over the next couple days we did another day of cragging at Murrin Park and ascent of the Squamish Buttress.   I convinced Jonathon to climb the Squamish Buttress with me since I had never climbed it, even though he had climbed it many, many times. We did “The Snake” to connect into the Buttress.  The 5.10 pitch on the buttress is pretty classic!


Leading the 5.10 crux pitch on the Squamish Buttress


Summit of The Chief

Jonathon and I also got a chance to climb one of our favorite routes on the Upper Town Wall at Index called Heaven’s Gate (5.11b).  It consists of four great pitches.  Pitch 1 is the first pitch of the Lamplighter and is the most burly 5.10 I have ever climbed!   This pitch is typically linked into the short 5.8 traversing pitch to set the belay up below the 5.11a crux.  The rack can be left here as the rest of the climb is bolted.  Pitch 2 starts out with a powerful and reachy move and then continues up for about 100 feet on amazing edges and crimps.  Pitch 3 is a short 5.10 pitch with a bit of an awkward move about 2/3 of the way through the pitch.  The final pitch is the crux and it climbs through two big roofs.  It is pretty amazing! We still need to go back and get the redpoint on this climb!  The climb can be rappelled with one 70 m rope.


Pitch 1 of Heavens Gate


Jonathon starting up pitch 2 of Heaven's Gate


Pitch 2


Pitch 2


Pitch 3


Jonathon entering the first roof on pitch 4 of Heaven's Gate

I also spent a couple days in Mazama in hopes of climbing at Washington Pass.  Unfortunately the weather wasn’t ideal and thunderstorms were forecasted limiting any big objectives.  I still managed to experience some of Mazama’s ‘unique’ sport climbing at both Prospect and Euro crag.  On my drive home, with no sight of thunderheads building I decided to solo the South Arete of South Early Morning Spire.  I’m not too psyched on soloing but this was totally within my comfort zone with only a few low 5th class moves and terrain that was generally not too exposed.  My favorite part was the exposed but short 5.2 ridge that gained the summit.  Having not been to WA Pass in several years, I had forgotten about the excellent quality of the rock and beautiful terrain.  I managed to down climb the route and didn’t end up using the rope I had had in my backpack.

Summers in the PNW are some of the best for alpine rock climbing and overall fun.  There is an endless amount of terrain to explore and so many more climbs that I can’t wait to do.


Michelle leading the first pitch of Lovin'Arms on the upper town wall at Index

Tuesday, July 17, 2012

Gear Review: Petzl Freino

As I was struggling to lower my 200 pound climbing partner off of a steep overhanging route in Thailand, he yelled out to me, "Why aren't you using one of those special Petzl carabiners?"  At that point in time, I had no idea what he was talking about, but anything to increase friction when descending seemed like a great idea to me!


Used in belay mode

A couple months later, I ordered a petzl freino and have been using it regularly as my belay carabiner.  Since it's a bit heavier (85 g), it is mainly for cragging.  It is designed to use with single ropes to increase friction when lowering or rappelling.  It works especially great with a gri gri or any other belay device.  The 'mini' carabiner on the side of the device is easy to use and greatly increases the friction for descents. It works great for lowering heavier partners and also while rappelling.  I wouldn't recommend using the additional friction 'mini biner' while lowering partners that are the same weight or lighter, as their descent can be a little bumpy when that amount of friction is used.  In these circumstances, the carabiner can be used as your standard locking carabiner.  I used it the other day when I rappelled on a single strand with my gri gri and it added a significant amount of friction that ultimately helped me feel safer while rappelling.

The carabiner is a bit awkward to put on a belay loop or gear loop when a gri gri is also on it.  It seems like the gate doesn't open wide enough when a gri gri is also on the carabiner.  Additionally, the auto-locking system may contribute to this awkwardness.  The carabiner also needs to hang on just one axis, otherwise it hangs in a less than streamlined way.  This results in a little bit of extra fiddling when getting the carabiner situated on a belay or gear loop.

Bottom line:  This is a great piece of equipment to increase friction and ultimately safety.  I wish I had one in Thailand!


Used in rappel mode

Sunday, April 1, 2012

Gear Review: Petzl Ange S & L Carabiners


I spent spring break out in Red Rocks, Nevada and brought down some of Petzl’s new Ange S carabiners, Ange L carabiners and Ange Finesse quickdraws to check out. While these debuted last year, they still are fairly new on the market and the innovative design has yet to be replicated by other companies.

The carabiners are very light weight and combine the traditional gate carabiner with the classic wire gate carabiner. This is done by using just a single, straight piece of aluminum as the gate. This both reduces the weight and provides a smooth clip often associated with a traditional gate carabiner.

This quickdraw incorporates an Ange L on the bottom and Ange S on the top

Other notable features include the keylock system which helps eliminate the possibility of the nose getting stuck on a sling or bolt. There is a subtle indent on the bottom of the carabiners that helps keep the rope or sling in place. Also the nose of the carabiner has a hole in it that allows ice, snow or dirt to be cleared out.

At 28 g, the Ange S is the lightest and smallest. The Ange L is 34 g and slightly bigger. The quickdraws come in four different styles, with different lengths and combinations of Ange S and Ange L available. As a comparison, Black Diamond’s Oz is 28 g and their Neutrino is 36 g.

The Ange S is on the left and Ange L is on the right

After using these on a variety of sport climbs and multi-pitch trad climbs, the Ange L has become my favorite. While it takes a bit of getting used to when clipping the rope into the carabiners, I am starting to get really comfortable with them. The Ange L seems to be a little easier for clipping due to its larger size. I haven’t quite gotten used to the smaller sized Ange S and my partners with bigger hands have commented that they have almost dropped them due to their small size. However, the Ange S does work very well when being clipped directly into a bolt. That being said, I think I would tend to prefer a little extra weight in exchange for ease of clipping.

Bottom line: these are super light and I will continue to use the Ange L on runners and slings for long mulit-pitch and alpine climbs when limiting extra weight is essential.

Saturday, March 3, 2012

Terminal Cancer


Yes that line is skiable.

Over President's Day weekend, I made my annual trip to visit Jonathon at the Ruby Mountains in Nevada. Since he was going to be working most of the time, I brought along my friend Margaret. On our first day there we teamed up with our new friend Doris and planned to ski the super classic line known as Terminal Cancer. This is about as unique as skiing gets. First, the Rubies are located in a high alpine desert with sandstone cliffs and desert vegetation. How often do you go skiing in the desert?! Second, this coulior is about 15 feet wide on a 30 degree slope for about 1800 feet and lined with very tall sandstone walls.

Margaret shredding!

It is approached by driving up Lamoille Canyon and parking at the end of road. It is then about a 15 minute skin up the road to where you try to find a place to cross the creek. The creek was very low but there was a bit of bushwacking involved. After crossing the creek, we skinned up the apron leading to Terminal Cancer. Once we reached the narrow coulior, we strapped our skis to our pack and booted up about 1800 feet to the top of the coulior.


Up and Up and Up...

Doris checking out the views from the top.

The coulior tops out at about 10, 000 feet and my lungs were definately feeling it since I had traveled from sea level the day before. There isn't much room for hanging out at the top so we gingerly stepped into our skis and jump-turned our way down the steepests parts. The snow was good and there was enough for all three of us to enjoy. It was a great day and definately some of the most unique and awesome skiing I have ever done!


Celebration with Jonathon and his fancy crown royal jacket.

Sunday, February 12, 2012

So there is Ice Climbing in Washington: Flow Reversal and Source Lake Line


Veronika starting up pitch 2 of Source Lake Line.

My first day out ice climbing this season and first time ice climbing in Washington was a day trip to the Source Lake basin below Chair Peak in the Alpental Valley. I am not much of an ice climber and every winter I tell myself that this is the season to get better. Unfortunately it never seems to turn out that way due to injuries, lack of time, lack of ice and a desire to go rock climbing. But on Saturday I teamed up with Veronika and she showed me that there is actually ice in Washington!

Source Lake Line. We took the right hand side. The left side is a WI 5.

After wallowing around in the low clouds and light snowfall, we finally found our line. Snowshoes or skis would have been nice as we were punching in quite a ways while breaking trail. Source Lake Line climbs a little gully about 500 - 1000 lower than the base of Chair Peak on climbers left. Veronika led up one very long mellow first pitch and opted to take the right hand variation, as the left side looked very steep and thin. The short second pitch was steep, WI 4 that looked like it hadn't been climbed all season. We topped out and rappelled off two very small tress. One 60 m rappel gets you to the base.

Second pitch of source lake line. Photo Veronika Glukhova.

We descended a couple hundred feet and then did a traverse for a couple hundred feet (skiers right). We ended up at the base of Flow reversal, which climbs on the buttress just beyond Bryant Coulior. Its another 2 pitches of WI 3 & 4. Again Veronika led a long first pitch with variable ice conditions and minimal good protection. The second pitch was a short and steep with a fun little ice chimney. One 60 m rappel off a little tree brought us to the base. It was a fun day and now I know that there is ice in Washington!

Traversing over to Flow Reversal. Photo Veronika Glukhova.

Flow Reversal. Photo Veronika Glukhova.


Finishing the second pitch of Flow Reversal. Photo Veronika Glukhova.


Friday, January 20, 2012

Thailand!


Anchored long tail boat on Tonsai Beach.

View from the Cat Wall. Photo Jonathon Spitzer.

Jonathon and I went to Southern Thailand in mid-December for 3 weeks of climbing, swimming, tanning, and vacationing. After 24 hours of travel, we ended up on the famous Tonsai Beach and wondered up the hill to our little bungalow. Within hours we ran into our friend Dylan and the adventures began.


Dylan drinking a delicious coconut shake.

Tonsai is all that its talked up to be. Steep limestone climbing right off the beach, beautiful views, short approaches, complete with reggae blasting from all the bars. And lets not forget the endless fruit smoothies. We began the trip very motivated and were climbing close to 10 pitches a day, with a bit of a siesta around lunch time. As our sport climbing muscles got stronger we started trying harder routes and were only able to do 3 or 4 climbs a day. Also the heat is a bit of a motivation killer.


Climbing the crux pitch on Humanality. Photo Dylan Taylor.


Sending on muscle beach.

Or not

Tufas big enough for sitting on!

Some of our favorite crags were the Keep, the Thaiwand Wall and the Cat Wall. All the climbs on Tonsai beach were pretty great and made for some good people watching too. Although I could do without all the crowds.

The scene on muscle beach. Photo Jonathon Spitzer.


Hot pan on Christmas Eve! Photo Dylan Taylor.

New Years Eve.


Tonsai Beach

One of the best days was out at Ko Yawabun. It is a half hour boat ride from Tonsai and once we reached the island, you literally climb right out of the boat on a fixed line! This took us to the start of “To the Members” on the ThaiTanium Wall (4 pitches of steep 5.11). The views were unreal and the exposure was awesome. After rappelling back to the fixed line, I took myself off the rope, sent my shoes and chalkbag down with Jonathon and jumped the final 30 feet into the ocean. It was exhilarating! For more info see: www.snowroackandiceadventures.com


Dylan jugging the fixed line to the base of the climb. Photo Jonathon Spitzer.

I love the taste of chalk! Photo Dylan Taylor.

Resting in a cave before the final crux move on pitch 2. Photo Dylan Taylor.


Rich pulling Jonathon into the boat. Photo Dylan Taylor.

The speedy descent! Photo Dylan Taylor.

Our boat driver, Cleft, navigating the stormy seas on our trip home. Photo Dylan Taylor.


We detoured to this beautiful beach on Chicken Island to wait out the squall. Photo Dylan Taylor.

For the final 5 days of our trip, we teamed up with our friend Jeanna and headed to the island of Ko Loa Liang. We left Tonsai in the middle of a massive monsoon. The sky was letting go of heavy, warm rain. We weren’t sure if we would even make it to this next island. However,, the seas were calm on the boat ride out of Tonsai and we made it to Ao Nong soaking wet. We convinced our group to spend the night in Krabi and so we could dry out. We took in the sites and experienced a little Thai culture by checking out a temple and going to the night market.


Hmmm, what to eat....

The next day we took several van rides to a different part of southern Thailand. It reminded me a bit of traveling in Mexico but everything was in Thai and not Spanish.

Random bus stop somewhere in Thailand.

Eventually we turned into someone’s driveway and we were at the dock. The hour long boat ride was beautiful.


Eventually we arrived to Ko Loa Liang. This island has one low-key resort and is capped at 40 people. Upon arriving, I immediately knew we were entering pure tropical paradise.


It was a glorious couple days filled with sea kayaking and climbing. Unlike Tonsai, it was not crowded at all. No lines for climbs and an empty beach. This was my kind of scene. The only downside was the pretty terrible food (I’m the least picky eater I know!) and the quality of the climbing, e.g. I broke a jug and took an exciting 30 foot fall. But it’s all part of the adventure. It was a great way to spend our last couple days in Thailand.


Jeanna and I returning from sea kayaking. Photo Jonathon Spitzer

Final Sunrise on Ko Loa Liang

Good night.